|
In March 2019, I decided I would force myself to write on a blog on a weekly basis in order to build my writing muscle. Giving myself a weekly task and an unofficial target of 1,000 words seemed doable, and it would let me see if I *could* write every week.
In the 150 weeks since I started, I probably wrote 120 times. It was hard to build the routine at the start, but over a few months I found I looked forward to writing on Sunday mornings. I logged items through the week that I wanted to write about, and was able to keep a nice rotation of sections - profound items found that week, reading, cycling, beer, words. Writing every week became a drag about four months ago. The problem was not that I did not want to write, but that I did not want to write about those particular topics. I still like reading and beer and learning new words, but I did not want to write about them. Looking back at the number of weeks in the past few months where I skipped a week, it was clear this blog was a chore I no longer wanted to do. With that in mind, I have decided to end this blog. I am going to replace it with a new writing schedule with different categories. The specifics of the categories and the schedule will be released later once I am comfortable with my plan, but it will be more about writing fiction instead of writing as reporting. For the small handful of people that came by and read this every week, thank you very much. I look forward to your feedback as this site morphs in the near future. RWM. 03Apr2022
0 Comments
Greetings from 53.5° north latitude, the land of nearly 11 hours of daytime! I jest of course, but it is nice to go leave for a bike ride at 07:30 with the sun fully up and it being bright outside.  Posted for posterity. Note how much daylight we had today. In potentially interesting news, I am learning how to stream on Twitch and YouTube. I have no visions of becoming a full-time streamer, but I am keenly interested in how to make that work. I am also not a gamer per se, and certainly do not have the reflexes or emotional disposition to play first-person shooters which seems to be the most common game genre played by many full-time streamers. Instead of that, I decided to stream a few sessions of playing Microsoft Solitaire. Solitaire is definitely more my speed, plus it is something I would do every day anyway. As a result, I figured it would be the easiest game for me to play while learning how to stream. Even with something I am so familiar with, I found it incredibly hard to simultaneously talk cogently and concentrate on playing. I had respect for the FPS streamers before, but even more so now after experiencing how hard Solitaire was to do well during a stream. As I say in the videos, I am doing this to learn about the Twitch and YouTube platforms. If people watch, great, but I will continue to post the streams and recorded sessions until I figure I have learned enough regardless of the number of viewers. That said, I somehow had four people watch a recorded Twitch session, which kind of blew my mind. If you are at all interested, you can see my Twitch channel here where the live streams and last thirty days of content are located. A more permanent record of the videos I deem "worthy" will be uploaded to my YouTube channel here. 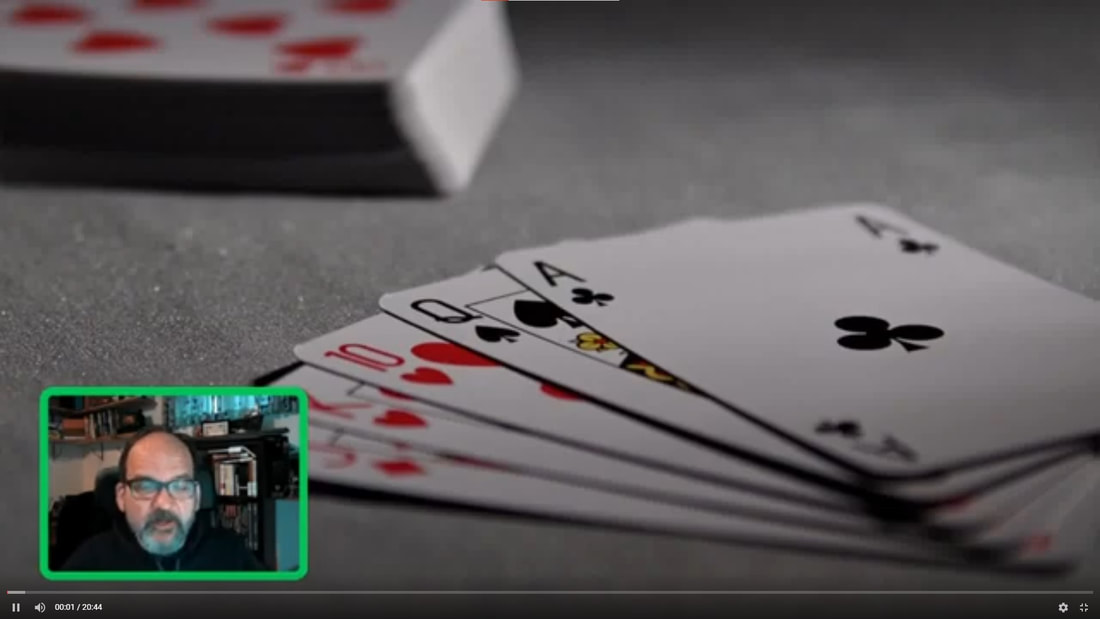 hahaha I look funny!  Reading Pile: Book #8 for 2022 was "Keep Sharp" by Sanjay Gupta. This was a book I started a couple of times and could not get enough momentum to finish. I finally had a road trip to visit my mom and used the three hours of travel time to plow through the second half on an audiobook version from the library. To use an analogy from my career and work experience, many (all?) self-help or self-improvement books have enough good information for a memo or an agenda item in a meeting but get stretched to cover the entire time for a full-day retreat. Keep Sharp fit this analogy perfectly. Give me an overview of the science and I will be happy: Plaque on the brain is bad? Got it. Inflammation anywhere in the body is bad for the body AND the brain? Makes sense and I can use that to change habits. My diet affects my brain? Understood, thanks for the heads-up (pun intended). Definitely enough information for a memo or an item on the agenda for a larger meeting. But instead of that, we get the full-day retreat version. Ten hours of information, anecdotes, and here-is-what-I-experienced-when-I-visited-this-famous-person stories. Ten. Hours. Thankfully, audiobooks have the option to be listed to at 1.25x speed. Sigh. New Drinks: Four new beers this week, with two that were disappointments. Both of the Blind Enthusiasm beers failed in my mind because the goal seem to be different instead of just focusing on quality. This seems to be a real failing for so many breweries at present. Instead of making something good, the trend seems to be to combine elements from several beers - hoppy lager, dark lager, et cetera. Give me a Warka from Poland or a Hacker-Pschorr Münchner Gold from Germany any day over a lot of these mashups. There were two good beers though, with the best coming from Driftwood Brewing in Victoria. The four beers were the Blind Enthusiasm South Island Hoppy Lager (3.25 / 5); Blind Enthusiasm Lager O'Darkness (3.0); the best of the week, Driftwood Brewing's It'll Be Fine Southern Hemisphere IPA (3.75); and, Samuel Smith's Tadcaster Taddy Porter (3.5). These four bring my lifetime unique check-ins on Untappd to 870. 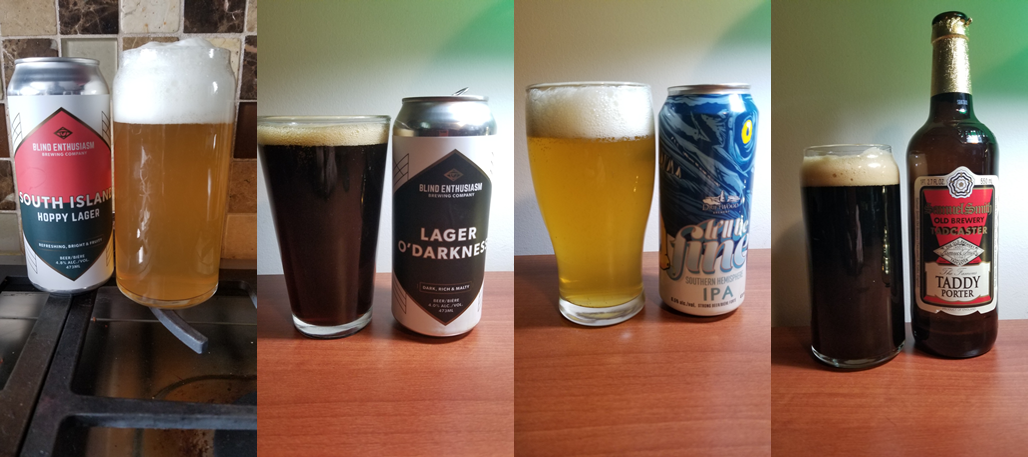 New Words:
Three new words this week from either my year-long Reddit group re-read of "War & Peace" or from the Gupta brain health book. hospodar [ˈhäspəˌdär] NOUN
cunctation [kəNGkˈtāSHən] NOUN
inimical [iˈnimək(ə)l] ADJECTIVE
Greetings from another winter week from 53.5° north latitude. I posted an updated on the Gaming section about the gaming campaign settings and rulebooks I have recently received. I also found a great jazz trumpeter that I have really dug into in the past week, finished one book, and had one new beer. So all in all, a pretty quiet week.
Reading Pile:
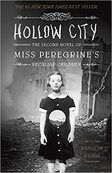
Book #7 of 2022 was "Hollow City" by Ransom Riggs, the second book in the "Miss Peregrine's" series. This is another book I read to / with my younger daughter. It was fairly good with some genuinely interesting emotional moments. There was a bit too much teen angst in parts, but the characters were decent, and the premise was novel. We both really liked the ending, which of course means we will read the third novel in the series. So all in all, 3.5 / 5.
New Music:
Louis. Miles. Chet. Dizzy. Wynton. It does not take much of a jazz fan to recognize those names. All five are - were, I suppose, except for Wynton- amazing trumpeters, taking that simple instrument and doing so much with it. When I think of jazz, trumpet is what first comes to mind, and it is definitely my favorite jazz instrument. That was why I was so excited to learn about jazz trumpeter Mat Jodrell. Jodrell's 2018 album "Echoes of Harlem" was recommended as the album of the week on Jazzcord last week. This is a great collection of jazz standards and new compositions. Jodrell's playing is superb and his range is fantastic. Below is a link to the album on Tidal, but his latest album called "Grateful" is only available on Bandcamp.
New Drinks: I mentioned last week that I wanted to give the Umbria Gusto Crema a second try since I suspect I had an old bag with drier beans. I ordered the beans on Sunday and they arrived on Tuesday, so I am already digging in on that bag instead of moving back to Ace No. 1. The first few cups have been better with more flavor and a darker color. The crema is not as gusto as I hoped, but I am still learning how to improve my coffee so it might be my technique at this point. I will keep working on it and if I get a good cup, I will post another picture. 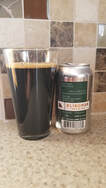
On the beer front, there was just one new beer this week. Beer #866 in the lifetime unique check-ins on Untappd was the Blindman Brewing Barrel-Aged Imperial Stout.
I was very excited when I bought this based on previous beers in the series. This release was good, but mine seemed a little flat. As you can see in the picture, there was very little foam. The flavors and the punchiness from the high ABV did not come through as expected. Like I said, it was good, but not as good as others from Blindman. (3.25 / 5) Greeting from 53.5° north latitude on Valentine's Day Eve. I am sure Valentine's Day Eve is a thing, but if it is not, I assert my copyright to that phrase and the abbreviated version of VDE in accordance with all applicable Canadian and international laws. It was a good week. I finished one book that I really enjoyed. I started another really good one and will likely finish it and another this upcoming week. There was some interesting news about state censorship in China and I posted an updated on the Gaming page. Beyond that, there were four new beers and one new coffee to report on, and after many weeks, a completed segment in the cross-Canada virtual tour. First up is the update on the Gaming page. In the past two years, I have backed several Kickstarter campaigns and have achieved Superbacker status. (I am not sure that title gets me much other than potentially a bit more attention when I post something about a campaign on the Kickstarter site.) In the past, I have written about the Kickstarter campaigns I backed, but the last two updates were July 2021 and October 2020. So many campaigns have been delivered since then, and I thought I should write them up. With that in mind, there is an entry on Gaming about exactly that. As you can see in the entry, most of the campaigns I back are related to gaming. Some of the campaigns I back are not, but I purchased as props and supplements for gaming regardless. Hop over to the article on Gaming for that update. Next is an article from BBC about censorship in China. From what I read, censorship by the Chinese government is a given, but I did not have much context for how it manifested in day-to-day life. Apparently it is more than a lack of books or magazines that speak of topics inconsistent with what the Chinese government promotes. The BBC article highlighted how movies can be changed for release in China. Note: significant spoilers ahead. The movie in particular was "Fight Club", the 1999 classic with Brad Pitt and Edward Norton. In the ending of the uncensored version I, and likely anyone who reads this, watched, Norton kills Pitt and blows a bunch of stuff up. In the censored version, the ending is replaced with some text. "Through the clue provided by Tyler, the police rapidly figured out the whole plan and arrested all criminals, successfully preventing the bomb from exploding." I mean, come on! I am not a fan of censorship, but if you are going to censor something, just make the material unavailable. Allowing them to watch the whole movie and then cut to a textual ending that completely changes the story is inane. It is no wonder this act "ignited intense debate about cinematic censorship in China". More surprisingly, after the debate, the original ending was restored but one minute with nudity was not. The world is weird right now, maybe weirder than it ever was. I am afraid it will get weirder still, and with that, more dangerous.  Reading Pile: Book #6 for 2022 was "Moon of the Crusted Snow" by Waubgeshig Rice. There was a quote on the front cover that said, "Chilling in the best way possible". That quote concerned me as I am not a huge fan of thrillers and I do not like knowing that something bad is about to happen. That is probably why I do not like horror films. Anyway, back to this book. It was an interesting story and the buildup of suspense was much less hard for me to read through than I feared. Once I picked it up in earnest, I read most of it in one evening. The bad guy was obvious, and the resolution was mostly satisfactory. I have one unanswered question but that is not a result of poor writing. I will refrain from posting the question here as it deals with the closing chapter and is a big spoiler. (If I ever meet Waubgeshig Rice, I am totally asking him my question!). While I have read more eloquent writing, I am still glad I read this book. The best part (is best the correct word to use in this situation?) was the conversation with the Elder who explained how the end of the world is subjective depending on your perspective. As a note, when I originally posted this update on my LibraryThing Club Read 2022 thread, I was informed that there is a sequel in the works. I am really looking forward to reading that, and to reading more from Rice. Cross-Canada Virtual Tour: After many weeks of rehabilitation from a back injury, brutally cold temperatures, and then insanely icy roads, I finally finished another segment in the cross-Canada virtual tour. This was the first segment in the Thunder Bay to Sault Ste. Marie leg. I am now past Nipigon and am rolling toward Terrace Bay. Maybe this is my white-guy bias showing, but I thought with a name like Nipigon, I would find more connection to Indigenous history than I did. Wikipedia does reference how the Ojibwe people formally ceded the watershed draining into Lake Superior, which included this area, to the Province of Canada in 1850, but that is on the Lake Nipigon page, not the Nipigon page. The Wikipedia page for Nipigon does not reference any nearby airports, but it does state that it was the birthplace of famous Canadian curler, Al Hackner. Here is the updated progress chart. 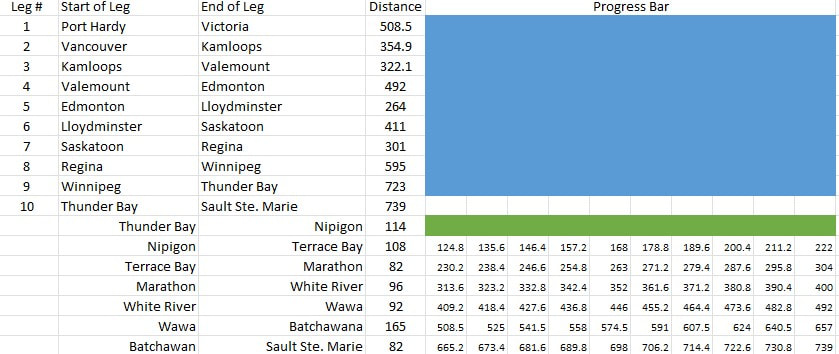 New Drinks: Four new beers were consumed in my personal quest to drink one of every beer in the world. My unique check-ins now sit at 865. None of the beers this week were remarkable, but only one of the four was not worthy of a recommendation. The four beers were the Analog Fandango Horchata Porter (3.25); Rochester Mills Imperial Milkshake Stout dropped 0.25 on the rating due to sediment and late-can bitterness (3.25); Hopworks Blood Orange Ferocious Citrus IPA had lots of off-putting floaties (2.75); and, Bent Stick Four-Thirty PM Late Afternoon Stout (3.5) 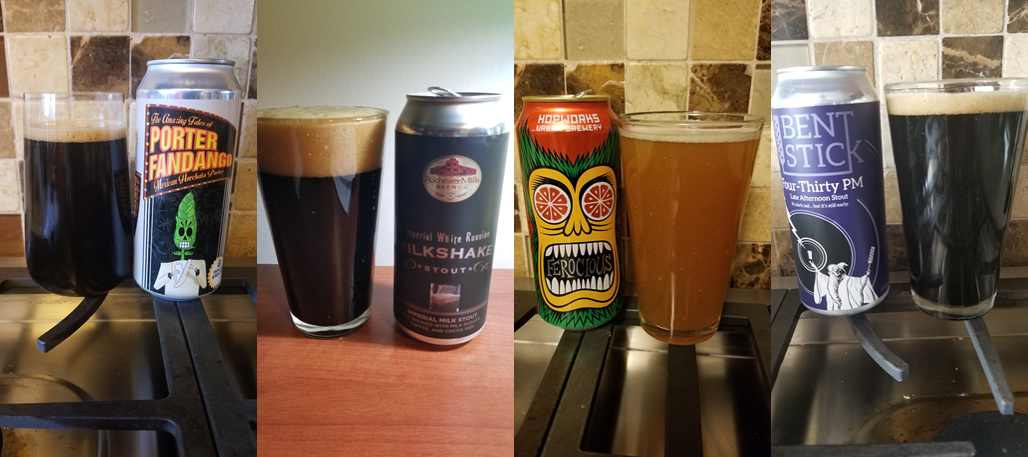 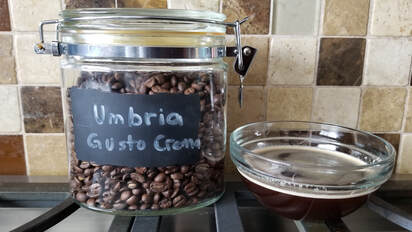 On the coffee front, I finished off a bag of beans from Umbria, their Gusto Crema. I was excited about this coffee since I had one other bag from them that I really enjoyed. The reviews for Gusto Crema are quite good as long as you can get fresh beans. I am pretty sure the bag I purchased had sat on the shelf for a while as the beans appeared dried out. To give it a fair review, I ordered a bag directly from Umbria. Here is what the beans I bought produced for comparison later. In the meantime, I am back to Ace No. 1.
(Note that I forgot to post this on Sunday, so it is a couple days late.) Greetings from 53.5° north latitude. The weather has drastically improved, and the days are getting noticeably longer. Technically it is still deep winter, but at least the worst seems to be behind us. This past week was filled with the posting of two game summaries, finishing one book, a six-pack of new beers, and two new words. I will not comment on the "freedom convoy" protests that hit most cities in the country other than to say they happened. Beyond that, there was nothing really profound to report on. I continue to spend a considerable portion of my discretionary time on gaming pursuits. I find gaming in all forms to be very enjoyable and the time I spend preparing satisfies my desire to create and be creative. In the past week, I summarized two of the sessions we had in the biggest campaign I currently run. The two sessions I recapped took place in the last week of August and the first week of September. Clearly, I am behind in posting about the game, but there is some value in that much time separation due to the objectivity that time provides. I hope to post at least two updates a week going forward, meaning that the gap between session dates and posting the recaps decreases each week. It will be interesting to see how I handle the session recaps as the gap decreases and the objectivity is potentially replaced with more emotional reactions. The posts for both sections are in the Gaming section of this site. Session 6 - Heading to Fort Beluarian - Mirtul 16 - 20 and Session 7 - Dinner with the Fist - Mirtul 20 -24 are now available if you are interested. If you do read them, I would appreciate feedback on the format I have settled on with the in-game recaps followed by a first-person section where I discuss my design process for the session. 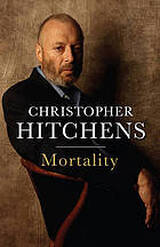 Reading Pile: I finished one book this past week. Book #5 for 2022 was "Mortality" by Christopher Hitchens. This is a collection of Hitchens's essays on his last year-and-a-half after being diagnosed with esophageal cancer. This was on my radar for the last year or so and showed up as a library hold from our public library's "recommend me a book" suggestion program. Mortality is a waif of a book, more like a long article from Atlantic or Foreign Policy. My father died last February from esophageal cancer like Hitchens so I thought the commentary about his experiences as a patient would hit me harder. Knowing a bit more about Hitchens now from reading this book, it makes sense that his essays would not be overly emotional even thought it would make me think and reflect. However, the afterword from his wife did hit me harder than expected. A good book, and worth reading. New Drinks: Last week was either stressful based on how much I drank, or really relaxing, again based on how much I drank. I averaged almost one new beer a week, which is significantly higher than the normal output (input?) of one beer every three-or-so days (2.74 was the correct number I reported last week). Even better than the quantity was the quality of the beers consumed. Three of the six were fantastic, and two of the less-than-stellar ones were decent. In order, the beers consumed were the Blind Enthusiasm Testo made with pizza dough yeast (4.25 / 5); New Level Pumpkin Porter (3.75); Born Colorado Autumn Amber (3.5); Cabin Brewing Amaaaaazing Sour (4.0); Growlery Belgian White IPA (3.0); and Eighty Eight Brewing Wet Bandits Triple IPA (4.0) That brings my total unique check-ins to 861. As always, my full profile and reviews are available on Untappd. Once you login, search for my username, robertwmartin. 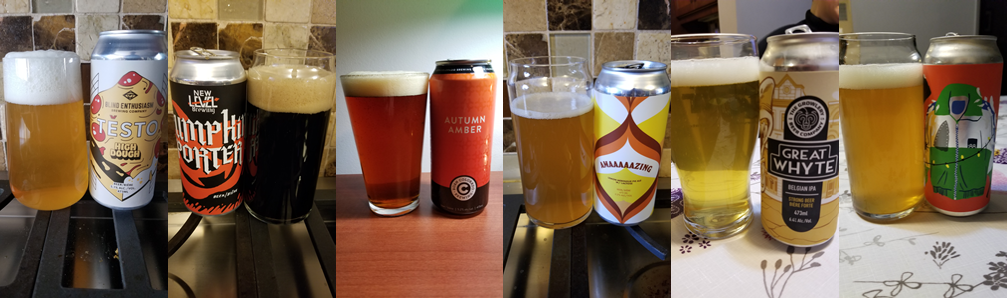 New Words:
Two new words this week. One is courtesy of one of my RPG games and the other is a word my mother used in her Wordle game the other day. I have no idea where she learned it, or if she knows it is not a nice word. mook [mo͝ok] NOUN
chola [ˌCHōlə] NOUN
Greetings from 53.5° north latitude. I read the above Tolstoy quote in "Calendar of Wisdom", a book of daily readings that Tolstoy compiled near the end of his life. I challenge anyone to look at the world and say that this is not good advice. I am reading Tolstoy's Calendar to complement "War and Peace", which I am reading with the r/ayearofwarandpeace subreddit again this year.

Moving on, I made a technical change in the past fortnight to improve my personal security. I have added email to my robertwmartin.com domain and am running all emails for that domain through ProtonMail. I resisted for a long time due to the personal change management effort - moving subscriptions from Gmail or career contacts to Outlook / Live will take a lot of work and time. However, I feel that moving to a system that is paid for independently of generating advertisement revenue for the email provider is in my better interest.
The user experience with ProtonMail is decent in comparison to Gmail or Outlook. There are things I would like, such as the ability to color-code calendar entries and the ability to add a map link to "location" field in an invite (but I know exactly why that does not happen), but even with those deficiencies the experience is fine. In other news, this past fortnight saw me finish two books, discover a great jazz Discord, sample four new beers, and learn a handful of new words. Let's get on with it, shall we?
Reading Pile:
Book #3 for 2022 was "Babylon's Ashes" by James S. A. Corey, the sixth book in the Expanse science fiction / space opera series. This was definitely my least favorite of the series so far. I found it dragged on much longer than needed, and most of the characters seemed flat and wooden. From discussions with others, it seems the series picks back up in the next book so I am sure I will continue with it, but there might be more of a gap between books this time as this book dampened my enthusiasm for the series. One item I think of often when I read the Expanse books is how much time they spend flying between locations. Living in the pandemic where for months on end my world had shrunk to my house or yard must be similar to living on a ship like the Rocinate travelling between planets. It is not hard to envision the Rocinate being similar dimensions to the mid-sixties lot my house sits on, so the comparison of the physical restrictions seem reasonable. In addition, most of the interplay between the main groups of characters, especially in this book, is done through screens. I suppose I do not live on the float and have to propel myself around the house by grabbing handholds, but there are similarities that I think of as I read through the series. Book #4 for 2022 was "The Secret to Superhuman Strength" by Alison Bechdel. I do not read a lot of autobiographies and did not know anything about Bechdel before picking up this book, so it was not obvious that I would read this book. In the form of a graphic novel, Bechdel decomposes herself from birth to 2021 and does so while explaining how society has changed around her, while struggling herself with change. I had no interest in reading anything by Jack Kerouac previously, but now I might based on Bechdel's book. That is a sign of a great book in my mind - something that makes you think and helps change your mind about something. For that reason, I mentioned on my "Club Read 2022" post on LibraryThing that this is a book that will stick with me. It might not have as much impact on you, but I do encourage you to read it to find out for yourself just in case it does resonate with you also. 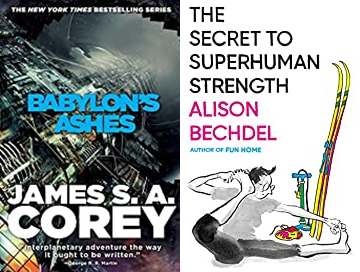
New Music:
As I mentioned in the intro, I discovered a jazz music Discord that I really like. Jazzcord is a helpful community of jazz fans with good discussions about music and artists, and an Album of the Week recommendation. If you are not into Discord, there is also a website that has some articles reposted from the Discord. Last week's Album of the Week was a 1960 live record of Cannonball Adderley called "At the Lighthouse". Adderley's "Mercy Mercy Mercy" is one of my favorite songs, so I was excited to listen to more from him. Tidal has a remastered version of the album and it is a great listen. Adderley died after a stroke in 1975 at the age of 46. He left us a lot of great music before passing.
New Drinks:
There were four new beers in the past fortnight along with one coffee. I am not ready to review the coffee yet but will do so next week. Spoiler alert: meh. For the beers, they were the latest in the Alley Kat Dragon Series of DIPAs, the Idaho Gem Dragon (3.25); the Debbie Approved IPA from Rural Routes out of Leduc, a new-to-me brewery (3.5); the Raspberry Milkshake Stout from Rochester Mills out of Michigan (3.25); and, another from Alley Kat, their Back Alley Brew limited run Calm Unity Red IPA (3.5). This brings my unique check-ins on Untappd to 855 for an average a new beer every 2.93 days since I started tracking. Of note, that is down from the new beer every 2.74 days when I started writing on this site. 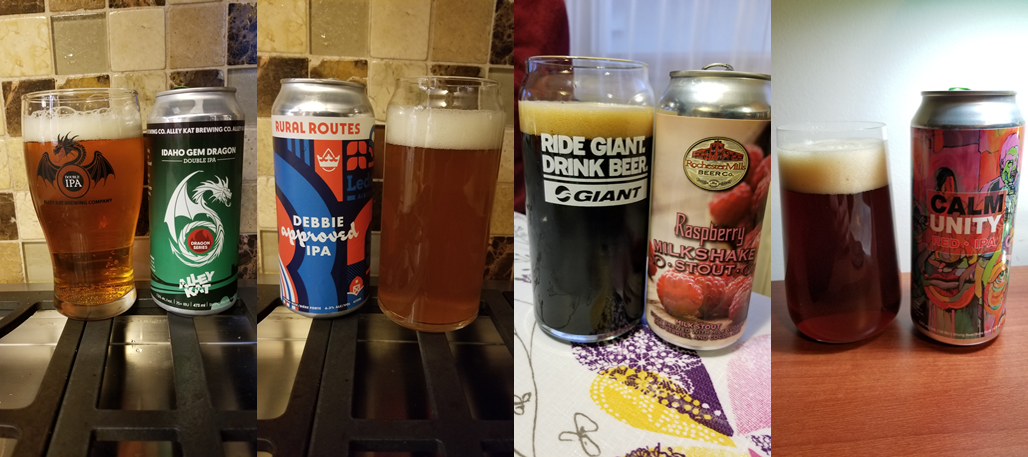
New Words:
All four of these came from Bechdel's books. glissade [ɡləˈsäd] NOUN
corbel [ˈkôrbəl] NOUN
intercostal [ˌin(t)ərˈkästəl] ADJECTIVE
parthenogenesis [ˌpärTHənōˈjenəsəs] NOUN
Greetings at the 1/24th point of 2022. It is depressing to think that half a month is already gone from the year, but at least the last week was relaxing, rewarding, and productive. Coming up is a recap of the first two books of the year, a look at my 2021 reading review, five new drinks, and one new word. Let's jump in. Reading Pile: First up for the reading section is an overview of my reading for 2021. I wanted to do a recap of the previous year's reading for the last couple years and actually did it this year. I was stoked as I started to draft the article earlier this week but ended up feeling a bit down. My numbers were done for the year and there were very few memorable books in retrospect. On the positive side, it did give me motivation to improve my reading in 2022 in several ways. I will leave the details for the actual article. If you want to know what I wrote about what I read, read "Reading Review for 2021" in the Long Form section of this site. Moving on to the reading progress for this year, Book #1 for 2022 was "Joyland" by Stephen King. I purchased this ebook three or four years ago after I read that the publisher, Hard Case Crime, had asked Stephen King for an endorsement but instead he wrote them a book. The book he wrote was not Joyland but it was a neat enough story that I picked up Joyland anyway. Joyland is a really good story, not so much of a horror as one might think coming from King but thrilling enough to be enjoyable. King did a masterful job providing hints and foreshadowing, talking about events and people that would enter the story at a later point. The conclusion was as satisfying as the plot. I am looking forward to reading more of King's books from Hard Case Crime. Book #2 for 2022 was my third lifetime read of "Our Man Weston" by Gordon Korman. This is a book I read in 2019 to my older daughter, and I enjoyed reading it just as much to my younger daughter in the past few days as I did three years ago. This is one of Korman's earliest books, and it is hard to find in any format now. That is a shame because the story is wonderfully put together and quite funny. I have a lot of good memories with Gordon Korman books both as a teen and as a parent, and this one is at the top of the heap. 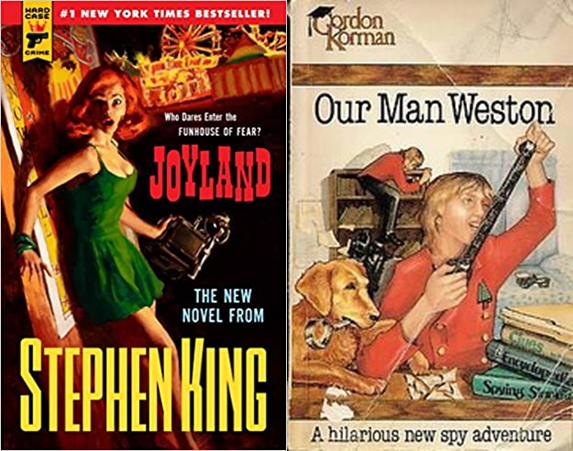 New Drinks: Five new beers this week, up from the two or three I predicted in last week's entry. Most of the beers this week were disappointing, particularly the Alley Kat which continues their trend of turning out underwhelming beers. The best of the week was the Born Colorado Earl's Ale, and even it was not great as it was overly sweet. Ol' Beautiful Okami Kasu Japanese Ale, made with rice (3.5 / 5); Hawk Tail Mexican Style Lager (3.25); Howe Sound Pothole Filler Imperial Stout (3.0); Alley Kat Candid Coffee Porter (3.0); and, Born Colorado Earl's Ale (3.75). These five entries bring me up to 851 unique check-ins and 1003 badges on Untapdd. 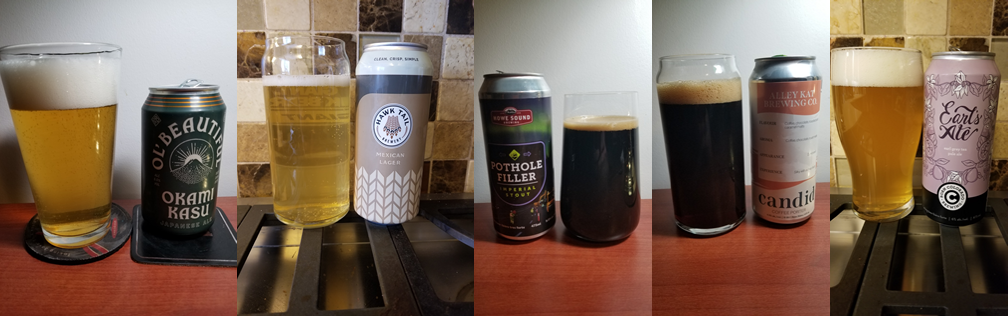 New Words:
Just one new word this week as the reading was fairly simple. There should be more next week as I will finish a relatively technical science fiction novel. neurasthenia [ˌn(y)o͝orəsˈTHēnēə] NOUN
¯\_(ツ)_/¯ Greetings once again. I hope you are well and that you haven't given up due to COVID. So many people are just shrugging it off, adopting an attitude of "oh well". I hope this is nothing. I hope omicron is mild. I hope we don't destroy our healthcare system. But I fear for the worst. In the twenty-two months since I first wrote about COVID, a lot has happened. We rallied around hope and supported our healthcare workers. We changed everything about our lives and daily routines. And we got tired. Author Chuck Wendig summed it up beautifully in his most recent newsletter. Hahaha. Haha. Hahahhahgaaaaaaah yeah ---Chuck Wendig, "The Great Surrender: How We Gave Up And Let COVID Win" Okay, to be fair he said a lot more than that. Read the article for yourself to see his take on how we have given up and are letting COVID win. Note: it is not for the faint of heart and you should probably not print it at the office. Let's move on to other less depressing topics. How about the global economy? Nothing sad or depressing there, right? My friend Chris sent me this link, a visualization of the global economy. Many interesting facts stick out.
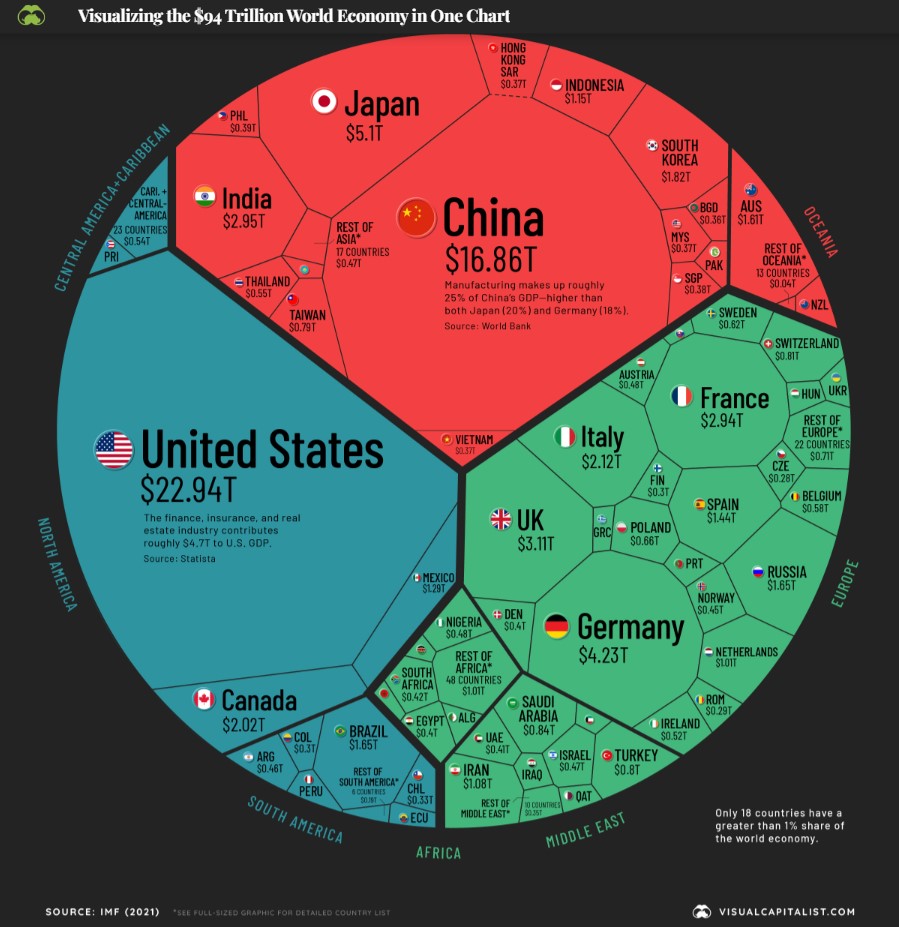 Visualizing the $94 Trillion World Economy in One Chart - visualcapitalist.com If you want to ignore the economy and the pandemic and have ten minutes, try out "If the Moon Were Only 1 Pixel." This is a wonderfully done model of the solar system scaled so that the moon is the size of one pixel on your monitor. Fun fact: the distance between Neptune and Pluto is much greater than the distance between Earth and Jupiter. Crazy. 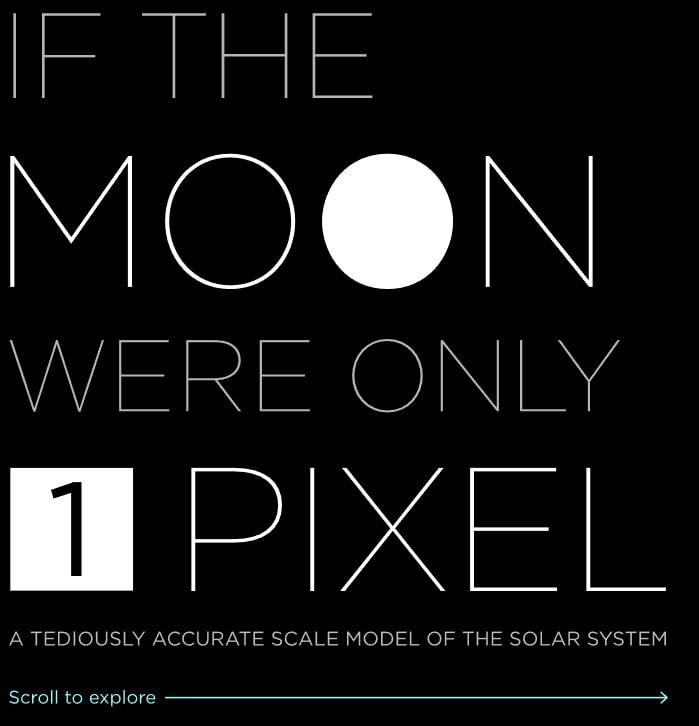 https://www.joshworth.com/dev/pixelspace/pixelspace_solarsystem.html That's it for this week, folks. No new books, no new drinks, no progress on the virtual tour, and no new words. I decided late Friday that I need another week off, so I should get through two books this week and I will likely have two or three new beers to report in addition to a new coffee. (It has "crema" in its name. Can't wait to try it!)
Greetings from 53.5° north latitude on the second day of the new year. This week's post highlight items resulting year-end reflections and from the year-end rush to finish as many books as possible. Before we get to that, look at this following image from a Daily Hive article from Monday.  "14 of the top 15 coldest places on Earth right now are in Canada" (https://dailyhive.com/edmonton/coldest-places-on-earth-are-in-canada?auto=true) On Monday, 14 of the 15 coldest places on the planet were in Canada. In addition, I live in one place on the list and have lived in three others and have visited eight of the other locations. I must really love living here to put up with this weather. In other depressing news, there was a fantastically bleak opinion piece in the Globe and Mail this week titled, "The American polity is cracked, and might collapse. Canada must prepare." The author, Thomas Homer-Dixon, discusses the "weakening of U.S. democracy", "ideological polarization", and how "between 20 and 30 million American adults believe the 2020 election was stolen". Homer-Dixon proceeds to discuss five, maybe six, parallels between America today and Germany prior to the rise of Adolf Hitler. The article does not leave much room for hope, but it closes with a request, almost a plea, for Canada to do more to stop what will potentially happen to our only neighbor in the near future. Canada is itself flawed, but it’s still one of the most remarkably just and prosperous societies in human history. It must rise to this challenge. ---Thomas Homer-Dixon  I'll leave this here as a reminder of what happened less than one year ago. Okay, so it is brutally cold, and our closest ally and only neighbor is potentially into a nosedive into anarchy. Is there anything positive to reflect on? Yes! I finished another perfect year of Solitaire. Take that radicalized American polity!  Reading Pile: I finished two books this week prior to the start of 2022 and ended up with a total of 45 books read in the year. Not bad, but not my best effort. One of these years I will actually hit 52 books in a year. Book #44 for 2021 was VALIS by Philip K. Dick. I have never been a fan of Philip K. Dick (and no, I was not going to say I am or am not a Dick fan) (and yes, I am still 12), as his writing is not nearly as good as his ideas. However, VALIS was both interesting and intriguing. Unlike other books by Dick, I found myself interested in the story. I do not claim to have understood everything in the novel due to the complexity of the topics - see the New Words section below as evidence of that. However, in the end I feel that I understood it enough. But what is it about? That is hard to say, but the description on WorldCat does a pretty good job of summarizing the plot. A theological detective story in which God is both a missing person and the perpetrator of the ultimate crime. The schizophrenic hero, a Dick alter-ego named Horselover Fat, begins receiving revelatory visions through a burst of pink laser light. As a coterie of religious seekers forms to explore these messages, they are led to a rock musician's estate, where a two-year old Messianic figure named Sophia confirms that an ancient, mechanical intelligence orbiting the earth has been guiding their discoveries. ---Synopsis of "VALIS", from WorldCat.org Book #45 for 2021 was the final book in the Harry Potter series, "Harry Potter and the Deathly Hallows". Harry Potter has been an enormous cultural influence in the past quarter-century, with the release date for the first book sometime in 1997. I read the entire series once, and then re-read the first few books again as a refresher before the movies came out. I read the first six books to my older daughter, and she read the seventh book herself. In the past eighteen months or so, I have read the entire series to my younger daughter, and on top of that, we are watching all the movies again (well, for the first time for my younger daughter). A few years ago, my older daughter puffed up her voluminous hair and dressed up as Hermione for Hallowe'en, and my younger daughter is currently building a cosplay outfit of Luna Lovegood complete with a copy of "The Quibbler" to read while being held upside-down. With all the time I have invested in these stories, it is weird to think that I am done with them. A couple more nights to wrap up the last movies, but that is it. I have no intention of reading the books again, and the movies are not good enough to watch again. I know I am getting old and that I am over half-way through my days on Earth, but like I said, it is weird to think that something that has been as big as Harry Potter will just be done for me. Said another way, it is weird to be experiencing a mortality revelation through the completion of a young-adult book series. As for the book, it was really good, and definitely my favorite of the seven books in the series. 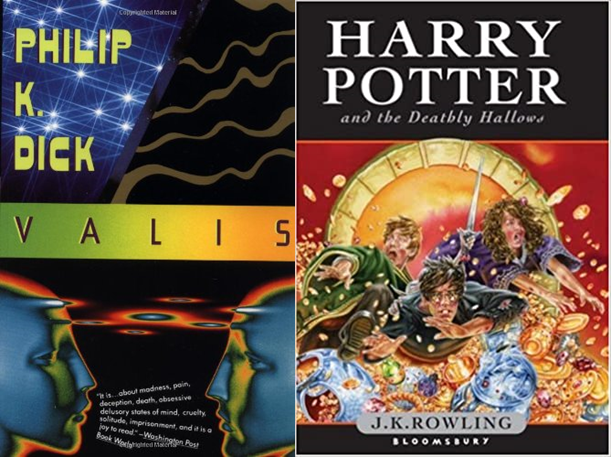 New Drinks: Four new beers this week, bringing my number of unique check-ins to 846. Warka Strong (3.75 / 5), Born Colorado's Mount Massive Russian Imperial Stout (3.75), Maxwell Spiced Mead from Australia (3.5), and Four Winds Nectarous Dry-Hopped Sour (3.75). A really good week for new beers! I would have had more this week since I was on vacation, but it was too cold to leave the house to go buy more beer. 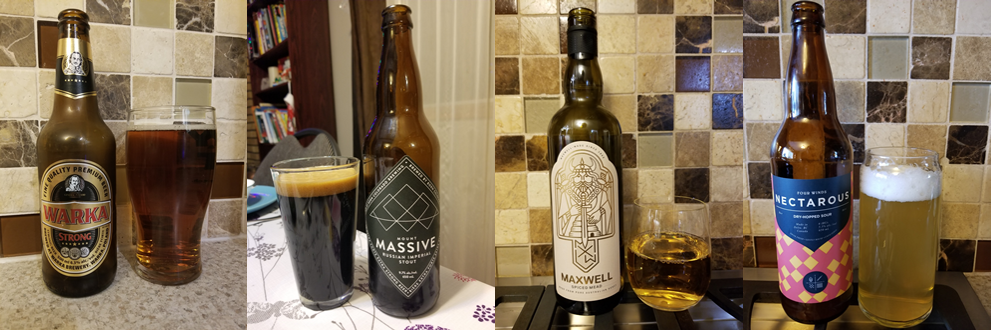 New Words:
The novel by Dick was a huge source of new words, largely due to my lack of knowledge in philosophy. The first one below was from Harry Potter though, and I took the definition from Urban Dictionary. done a bunk VERB
credulous [ˈkrejələs] ADJECTIVE
botheration* [ˌbäT͟HəˈrāSHən] NOUN
phagocytosis [ˌfaɡəsīˈtōsəs] NOUN biology
expiation [ˌekspēˈāSH(ə)n] NOUN
hypostasis [hīˈpästəsəs] NOUN
abreaction [ˌabrēˈakSHən] NOUN
(*Of interest, the phrase "Gordon Bennett" is listed as a synonym for botheration. Apparently, Bennett was quite a hellraiser.)
Happy holidays for all those celebrating, and for those that are not, peace and joy to you as well.
This is the second Christmas with minimal visiting and socializing, but all is not bad. Not having huge meals to prepare or large numbers of guests to provide for has made for a very relaxing holiday season. A few visits would have been nice, but I am not sure I want to go back to the mad rush of visits with dozens of people when we get out of this pandemic. I like how Neil Pasricha put it in his #pandemicedition of 1000 Awesome Things for December 25. 
Regular readers of this site will notice that I missed posting last week. Since there was not a mad rush leading up to the holidays, I was confident that I would post last week. However, the week leading up to the holidays was filled with responding to the log4J vulnerability. There are numerous articles discussing what this vulnerability is and how pervasive it is, so I will not go into detail here. My December 2021 prediction is that we will still be discussing this in December 2022 due to the number of breaches this causes. log4J has been described as the worst vulnerability ever, and the timing for its release could only have been worse if it had come out while many people were on holidays, instead of one week earlier.
Beyond log4J, the last fortnight was filled with finishing two books, one milestone on the virtual tour, four new beers, and one new word. Let's jump in.
Reading Pile:
I finished two books in the past fortnight, one I had started in 2020 and my favorite murder mystery to date. Book #42 for 2021 was "The Name of the Wind" by Patrick Rothfuss. I absolutely loved this book, but I did not finish it in 2020 when I first picked it up. The reason is that I saw the title of this YouTube video and without watching the video, I felt like the book was completely spoiled for me.
As a result of seeing that title, Rothfuss's book sat on my shelf sixty percent read for about seventeen months. When I finally picked it up again, I was able to immediately recall the story and the characters. I attribute that to how great the writing is. This is a great book and I am looking forward to the second and eventually the third books in the series.
Book #43 for 2021 was "Sparkling Cyanide" by Agatha Christie. As I mentioned above, this is my favorite murder mystery to date. It was not the most suspenseful and it did not have the most startling reveal, but the setup and character development was superb. In the end, I was surprised but not shocked and ultimately satisfied as the murder could have been done by anyone of the main characters. If you only read one novel from Christie, I suggest this one. 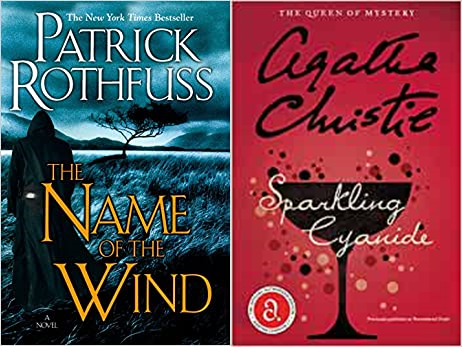
Cross-Canada Virtual Tour:
My progress toward virtually crossing Canada has been significantly hampered since early August because of the bike failure, a back injury, and then treacherous ice conditions. My bikes are fine, and I can maintain my back strength once again, but progress this week will also be limited due to the extremely cold temperatures outside. That all said, I was able to finish the Upsala-Thunder Bay segment, which completed - finally - the Winnipeg-Thunder Bay leg. I started that leg September 6, which means that it took nearly four months to complete 723 km. Not good. But at least progress has been made. Thunder Bay is an interesting location with a population of approximately 108,000. Thunder Bay was two cities, Port Arthur and Fort William, until January 1, 1970, which I found surprising. Wikipedia does a good job of documenting the rivalries of the two cities, plus their involvement in the fur trade, colonization, and assimilation. In keeping with my previous cataloging of airports for each stop, Thunder Bay is serviced by an international airport, with the IATA code of YQT. Here is the updated progress chart, complete with the segments for the next leg of the virtual tour, from Thunder Bay to Sault Ste. Marie. 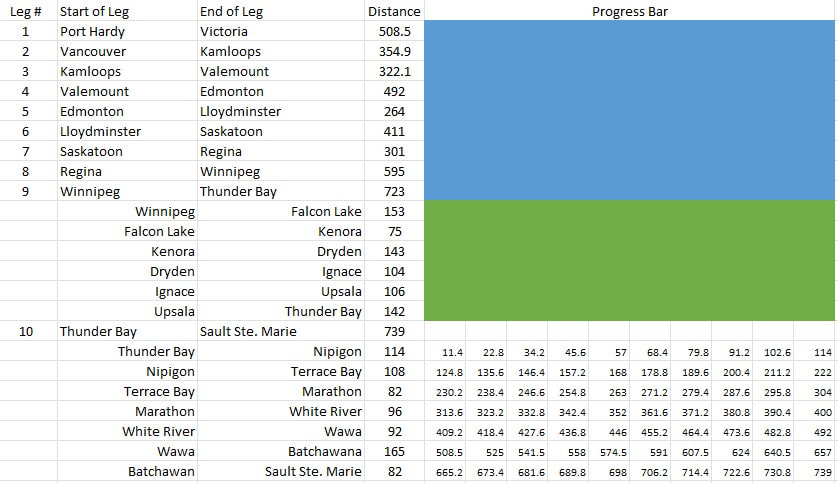
New Drinks:
Four new beers this week, with two that were worth recommending. Snake Lake Miss Mermaid Pale Ale (3.75 / 5) and Juxtapose Four Winds IPA (3.5 / 5) are worth trying. The two that you should not bother with are the Leżajsk Pełne Lager out of Poland (2.5 / 5) and the Anarchist Amber from Cannery Brewing in Penticton (3.0 / 5). 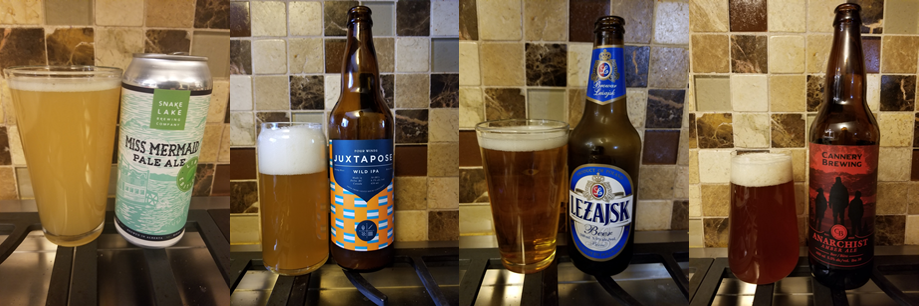
New Words:
Just one new word, assuming the words Rothfuss made up for his book do not count. rill [ril] NOUN
|
Archives
April 2022
Categories
All
|

 RSS Feed
